This week we had a special guest on Powertex Unleashed introducing us to Dry Brushing, a technique which always brings your Powertex projects alive
There is this moment which I love as a Powertex Tutor and that is when someone adds the first layer of colour to a project and it just comes alive, you see all the layers of texture working together and how just a little bit of pigment and varnish can bring out the finished project.
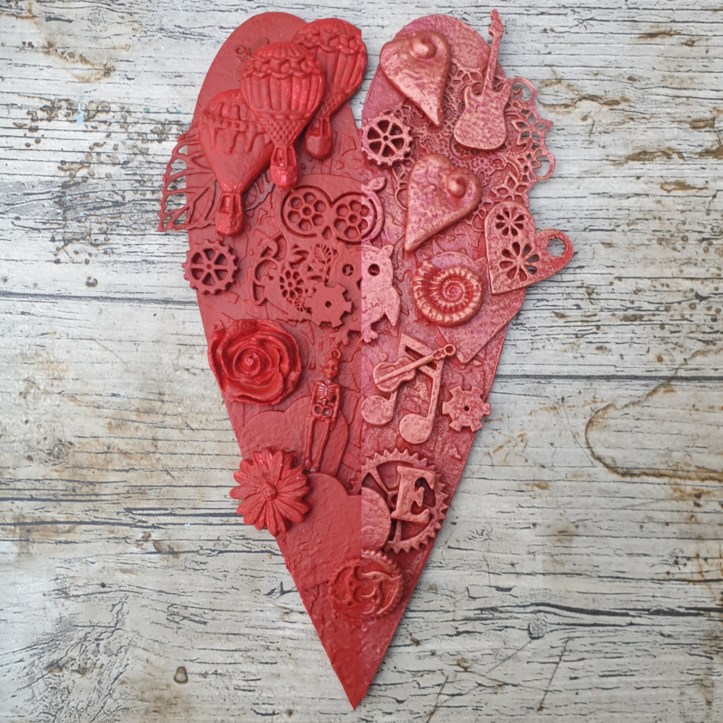
The technique we recommend for Powertex is called “Dry Brushing” that is because you wipe the excess pain off your brush so the brush is fairly dry before gently stroking the project, this is slightly different from painting as you add colour gently layer by layer and you want to avoid large blobs of colour. You want to build the colour up gradully. The Green Man in the project below has 27 layers of colour to build up the depth in the finished project.

When Dry Brushing you want to start with a small drop of EasyVarnish from Powertex (no bigger than a 5p piece). Dip your brush into the EasyVarnish and then to dip your brush into one of the many wonderful Powertex pigments to mix them together. You want to get quite a think consistency.
Next wipe the excess off your brush onto a piece of kitchen roll before gently stroking the brush over your project. When you have done this, if you want to add even more depth add a little bit of white into your pigment to give it a lighter tint and then brush over the tops of the projects. If you have multiple layers of texture you can keep adding white to your working palette and then dry brush smaller and smaller areas to give the illusion of depth.
Once you have finished with the matt colours, you want to go over the project with a metallic or pearl sheen by dry brushing on either the Colortricx or Secret Art Loft Pigments. You need to leave this until after the matt colours so you don’t hide the shine.
Sounds complicated? It’s not any of the Powertex tutors are happy to show you how to do it and look out for this weeks Powertex Unleashed over at the Powertex Studio
Hints and Tips for Dry Brushing
(1) Use a small amount of Easy Varnish and a small amount of pigment at a time, you want to mix to a thick paste
(2) Remember to remove the excess off your brush onto a paper towel so you don’t get blobs and streaks
(3) Build the colour up gently layer by layer and to add more texture add white pigment into your base pigment colour.
(4) If you do blob your colour, dry brush a layer of pigment close the Powertex Colour that you are dry brushing over, this doesn’t completely work with white or ivory but will dampen down the colour.
(5) Add colour slowly and one layer at a time and watch the texture evolve
(6) Scrape from left to right if you are right handed and the opposite way for left handed. You are less likely to get it on your clothes, your hands, your arms then on your top and in your mug that way… trust me on this one.
(7) Don’t worry, you can reach out to your local Powertex tutor, we are always willing to help
(8) And don’t throw the paper towel away, let it dry and you can add it to your text project as texture!
I said at the beginning that this week we had a special guest presenter of Powertex Unleashed and that is the very lovely Michelle Melville from “Mad Marvellous Things”. Michelle is an amazing tutor who I was lucky enough to do my original training with way back in 2019. She is known for her incredible models and upcycling projects including her rabbits, glasses and shoes. Based in the Corby area of the Midlands, if you live there I highly recommend you check her out, especially if you like gothic skulls and roses, as I know many of you do.

from Mad Marvellous Things
Mad Marvellous Things: www.facebook.com/madmarvellousthings Instagram: Www.instagram.com/madmarvellousthings E-mail: madmarvellousthings@hotmail.com
Check out The Powertex Studio on Facebook for more inspirations and the Powertex Unleashed videos.
What will you create?
Emma W
